
Shopping for vibraphones but not quite sure what you’re looking for?
Or how to tell the difference between one and the next?
Well you’ve come to the right place.
Because in this ultimate guide, you’re about to get a crash-course in all-things vibraphones…with some helpful model recommendations along the way.
First up…
Vibraphones vs the Other “Struck Idiophones”
If you’re somewhat new to vibraphones, you’ve probably noticed that there are several other instruments of different names that look quite similar.
Specifically these 3:
- Xylophones
- Marimbas
- Glockenspiels
Instruments such as these all fall under a class commonly known as struck idiophones.
Compared to its siblings, the vibraphone is actually the youngest of the 4 instruments. First invented in the 1920’s, it didn’t take long to become massively popular in the 1950’s Jazz Era.
While complete beginners might start out looking for any one of the 4 instruments in this category, they’ll often realize at some point that glockenspiels are actually the ideal choice, simply because they’re typically the smallest, cheapest, and easiest to start with.
In which case, here’s a separate post for that:
On the other hand, if you’re in the right place, let’s continue…
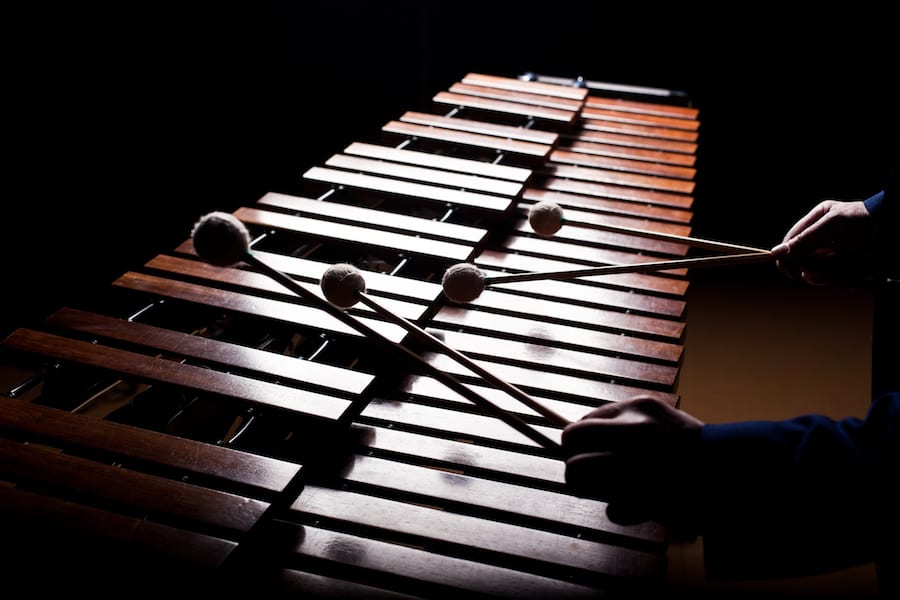
How is Tremolo Created with the Vibraphone?

The biggest distinction between vibraphones and other struck idiophone instruments its tremolo effect.
Despite it’s name, which inaccurately implies the vibrato effect (vibraphone)…
This effect is not an oscillation in pitch, but rather an oscillation in volume.
This signature sound is created with rotating disks at top end of the resonator.
Controlled by a motor, the speed of these rotating disks can be adjusted between 40-140 rpm, for a varying effect.
Up next…
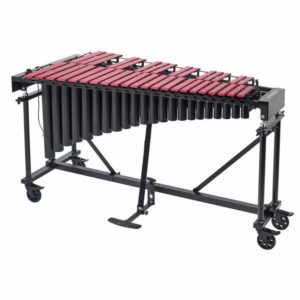
The Perfect Compact Vibraphone for Students and Beginners
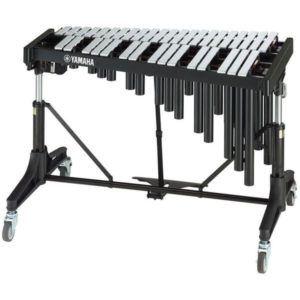
As a beginner of any musical instrument, you typically look for most affordable decent option, that’s popular among other beginners.
With vibraphones however, there aren’t really any options you’d call “cheap”, but this is the closet thing to that: the Yamaha YV2030MS.
With this model, you basically get everything you’d expect from an entry-level vibraphone, plus with a few nice extras including:
- Pneumatic Level Adjustment – for easy position adjustments
- Non Graduated Tone Bars – which are typically used on compact keyboards
- Large Casters – for improved mobility
- Parallel Damper – which is their new and improved dampening system
As you can see a lot of research and development went into designing this entry-level vibraphone, and the results speak for themselves.
Check it out:
- Yamaha YV2030MS – (Thomann)
For a similarly priced alternative with graduated tone plates, check this model out:
- Thomann Vibraphone by Bergerault – (Thomann)
Up next…
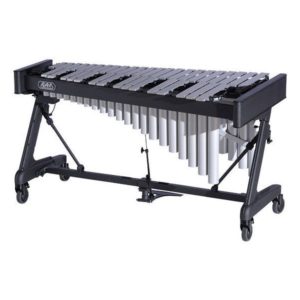
A Tough Vibraphone for Tall Players
Apparently, the Adams Solist weighs in at almost double the weight of the previous model we covered.
Which might sound like a bad thing, but since vibraphones really aren’t meant to be portable, more weight really just means more stability.
It also goes all the way up to 105cm, compared to the previoius model which tops out at only 85cm.
All these added bonuses stem from the newly developed Apex frame which offers an overall better support system, and even features an improved belt system for dampening, that is more durable than the traditional rod system.
Check it out:
- Adams Solist – (Thomann)
Next up…
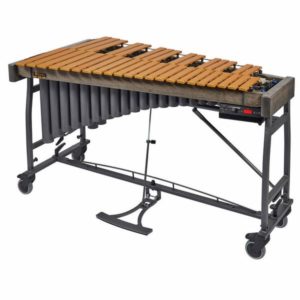
The Big Brother of the Previous Model

At first glance, the Adams Concert looks pretty similar to its little brother the Adams Solist, which we just covered.
And it is, apart from two notable differences:
- Low range tone bars are wider
- Resonators are shaped differently
If you know anything about vibraphone design, then you know that these two seemingly small details can actually result in an enormous improvement in overal tone, if done right.
And in this case, they were done right, because you can clearly hear how the results speak for themselves.
Check it out:
- Adams Concert Vibraphone – (Thomann)
Up next…
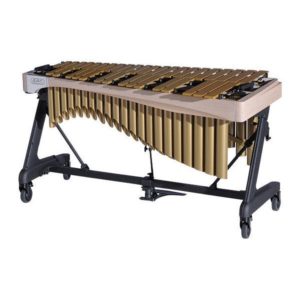
A High-End Model from an Iconic French Builder
As quite possibly the single most reputable name in orchestral percussion instruments…
The French manufacturer Bergerault has been around for 90 years…and to this days still builds their instruments in their workshop on the French countryside.
Over the years, they contributed many new innovations to the industry, such as being the first to buid a 4 octave vibraphone.
Currently, the Bergerault Voyager is one of their most popular high-end models…sporting the signature look of their gold aluminum alloy tone bars.
Check it out:
- Bergerault Voyager – (Thomann)
Up next…
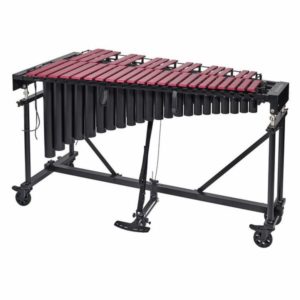
An Innovative Vibraphone with Some New Technology
With the OmegaVibe from Malletech, there’s several new innovative features never before seen.
For instance, they completely redesigned the tremolo system, using two full length wings the cover every hole in sync…as opposed to tradtional systems with individual flaps for each hole.
According to Malletech, this also drastically reduces the noise created by individual flaps.
They also redesigned the damper system, using a gel rather than felt…eliminating the buzz which the felt sometimes creates.
And finally, it offers fully tunable resonators, an obviously useful feature which we haven’t yet seen on this list.
Check it out:
- Malletech OmegaVibe – (Thomann)
Up next…
A Stunningly Designed Vibraphone for Pros
At first glance, it’s quite easy to see that the Adams Alpha is one fine looking vibraphone.
With a sleek flared cut on the resonators, a beautiful wooden frame, and matching gold tone bars and tubes…it’s easily has the most stage presence of any model thus far.
While aesthetics may not be a top priority for beginners, for professional acts, it’s almost as important as the sound…
Which isn’t lacking either by the way…thanks to Adams’ signature Alpha Tuning method.
They don’t disclose many details on this tuning method, but the result is a vibraphone with crystal clear projection.
In addition, the tone bars are made using a computer-assisted process that guarantees unrivaled stability in pitch and evenness in sound.
If you’re looking for the very best, the Adams Alpha Series n far away from it.
Here they are, available in 3 different octave ranges:
And for our final pick…
An Advanced Model for Serious Vibraphonists
For the second Malletech vibraphone pick on this list…
We”re going to finish with their top of the line model, the LoveVibe, which has some pretty crazy specs and features.
Perhaps the most unique and interesting feature of all, is the vibrato that adapts to the tempo you’re playing using the pedal.
Interestingly enough, this features is said to replicate the vibrato of a human’s voice.
Beyond this one amazing feature, what you can generally expect is a premium vibraphone built with the highest quality materials and precision.
Check it out:
- Malletech LoveVibe 3.0 – (Thomann)
Now one more thing…
Vibraphone Mallets: What You Should Know
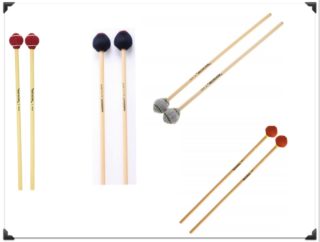
With vibraphone mallets there are 3 factors to consider:
- Head Hardness
- Shaft and Head Materials
- Weight
With hard heads, the attack is sharper. For soloing with a jazz band for example, you’ll want hard mallets.
On the other hand, softer heads have milder attacks, and more harmonics. This typically works better for ballads or classical pieces.
Regarding the shaft:
- Rattan – has a smooth surface and is very flexible
- Birch – has a porous surface which helps with grip but is very stiff
Now finally, regarding weight:
As you’d expect heavier mallets are louder, and are ideal for situations when more volume is needed, such as with a large jazz band or loud drummer.
To see some good mallets with a variety of these features, check out the list below:
Soft:
- Mike Balter 24R – (Amazon/Thomann)
- Mike Balter 44R– (Amazon)
- Innovative Percussion AA20 – (Amazon/Thomann)
- Mike Balter 24B – (Amazon/Thomann)
Medium:
- Mike Balter B23B – (Amazon/Thomann)
- Innovative Percussion AA20 – (Amazon/Thomann)
- Innovative Percussion F5 – (Amazon)
- Mike Balter 23R – (Amazon/Thomann)
Hard:
- Mike Balter 25B Pro – (Thomann)
- Mike Balter Dave Samuels Series – (Amazon/Thomann)
- Innovative Percussion F4 – (Amazon)
- Mike Balter 322R – (Thomann)
By the way, if you found this post useful, I highly recommend joining our free Home Recording Secrets email newsletter where you’ll discover….
- How to Get Your First Studio Up and Running in a Single Weekend
- How to Avoid Wasting Thousands of Dollars on Unnecessary Pointless Purchases
- How to Get a “Million Dollar” Pro Studio Sound in a “Thousand Dollar” Home Studio
- PLUS… All Sorts of Other Amazing Insider Secrets Revealed
And it’s totally FREE! Click here and Enter Your Email to Sign Up.
More Drum/Percussion Posts in this Series:
Drum Sets | Electronic Drums | Snares | Drumheads | Cymbals | Djembe | Bongos | Cajon | Conga | Cowbell | Tambourines | Vibraphones | Xylophones | Marimbas | Glockenspiels | Metronomes | Drum Thrones | Drumsticks | Ride Cymbals