
Today’s awesome “music-talk” topic: Audio Interfaces
Here’s just a few of the juiciest “insider home recording secrets” you’re about to discover:
- Is Your DAW Compatible With Your New Interface (How to Quickly and Easily Avoid This One Common Mistake)
- How to Find The Ideal Size Interface for Your Studio. Not Too Big, Not Too Small, But Just Right
- Rackmounted vs Desktop Interfaces? Which is Better…And Why?
- PLUS… The 10 Best Audio Interfaces Currently on the Market as of This Year (And What Exactly Makes Them So Damn Awesome?)
Best Part: Just a few minutes from now, you’ll know this topic inside-n-out – and find exactly what you need for your setup… Guaranteed.
Here’s what you’re about to discover:
- So…What Exactly Does an Audio Interface Do?
- Is Your Audio Interface Compatible with Your DAW?
- Which Digital Connectors Are The Fastest?
- How Many Ins/Outs Do I Need for My Studio?
- Mic Inputs vs Line Inputs vs Optical Inputs
- Desktop vs Rackmounted Audio Interfaces
- The Perfect Cheap/Simple Interface for Solo Work
- A Minimalist Interface for Mobile Studios
- An 8-Channel Rackmounted Interface for Beginners
- A New Interface from a Legendary Name In Pro Studios
- Successor to One of the Best Interfaces of All-Time
- An Interface with the Most Iconic Compressor Ever… Built-In
- The New Standard in “Prosumer” Audio Interfaces
- The Ultimate Audio Interface for Guitarists
- A Legendary Professional Interface in a Compact Format
First up…
So…What Exactly Does an Audio Interface Do?
When shopping for audio interfaces, newbies are often unclear on what exactly an audio interface actually is, and why they need one.
So very quickly, let’s clear this part up before moving on.
The audio interface is the device that allows the DAW software on your computer to communicate with the other physical devices in your studio.
Which means it allows you to:
- Record sound – from your mics and instruments
- Listen to your mixes – on your headphones and studio monitors
And that’s pretty much it. Moving on…
Is Your Audio Interface Compatible with Your DAW?
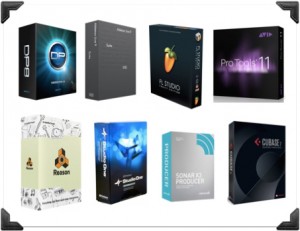
These days, there’s probably a 90% chance that your audio interface will be compatible with any of the top DAW software.
But if you already have a DAW you like, it’s probably best to verify compatibility on the company’s website, just in case.
For some reason, this info is often hard to find, and is usually buried somewhere within a FAQ page.
If I had to guess why…I’d assume that companies prefer not to advertise their current DAW compatibility, because they have no guarantee of future compatibility.
A particular interface might be compatible with your DAW today, but may not be in a future release. And while that’s not likely to happen, it’s always possible.
Which is why personally, I prefer using a DAW/interface combo made by the same company.
Unfortunately, the options here are limited, so you will likely have to compromise.
Up next…
Which Digital Connectors Are The Fastest?
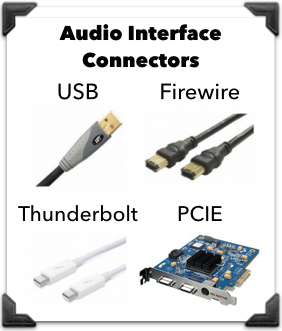
To connect your audio interface to your computer, there are 3 types of cables commonly used:
- USB – which is typically seen on cheaper home studio interfaces, and offers the slowest data transfer rate.
- Thunderbolt – which is increasingly popular with newer semi-pro interfaces, and is way faster than USB.
- PCIE – which has long been the standard connection for professional interfaces, as it offers additional processing power and extremely fast data transfer. These are also less common now due to faster computers.
While USB is the slowest of all 3 options, it’s still fast enough to get the job done for the vast majority of home studios. So if you’re on a budget, it’s what I recommend.
Ideally though, try to go for Thunderbolt, as it will likely become the standard connector of the future.
But whichever type you choose, remember to double-check that your computer has the appropriate connection.
Up next…
How Many Ins/Outs Do I Need for My Studio?
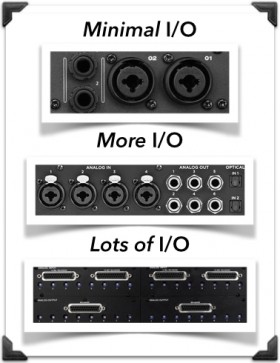
On typical audio interfaces, I/O counts can range anywhere between:
- 1-2 on a simple interface, to…
- 20+ on a professional one.
The number you need for your studio depends mainly on the number of live tracks you plan to record/monitor at once.
For example:
- Solo musicians – may need only 2-4.
- Songwriting teams – who work in small groups, want at least 4-8.
- Engineers who record bands – may have as many as 16 or more.
Electronic drum kits alone, (which is an amazing tool to record realistic drum tracks in a home studio)…will sometimes require up to 8 inputs for each part of the kit.
But for the vast majority of people reading this article, who only want a cheap interface that will allow them to record their music at home…2-6 channels is a great target range to start with.
Up next…
Mic Inputs vs Line Inputs vs Optical Inputs
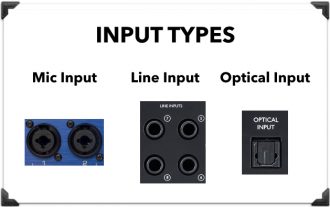
When counting up the input channels of your audio interface, manufacturers are usually referring to some combination of the following 5 input types:
- Mic – which allows you to connect a mic directly, and boost the signal with an internal preamp
- Line – which requires a pre-boosted signal, such as from a mic preamp or keyboards
- Optical – which can receive up to 8 digital channels at once, usually connects with an external multi-channel preamp
- DI – for connecting electric guitar/bass
- MIDI – for connecting keyboard controllers to use with your virtual instruments
And so…depending on your other gear available, you may or may not be able to use all of these connections.
If you mainly record with microphones, and don’t have an external mic preamp, take note of the mic preamp count on your interface, as that will determine the number of mics you can use simultaneously.
Up next…
Desktop vs Rackmounted Audio Interfaces
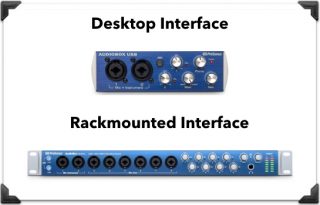
As we go through our top interface picks in just a moment, you’ll notice that they come in two general sizes:
- Desktop – which are smaller, and sit on your desk next to your computer.
- Rackmounted – which are larger, and mount in a standard-size rack unit.
For beginners, I recommend starting with a desktop interface, since they’re cheaper, easier to use, and require no special mounting or peripheral devices. You just plug them in and start recording.
With intermediate/advanced studios, rackmounted interfaces typically work better, as they offer more I/O’s, and more flexibility with signal routing and organization.
Up next…
The Perfect Cheap/Simple Interface for Solo Work
While not traditionally known as a maker of audio interfaces…
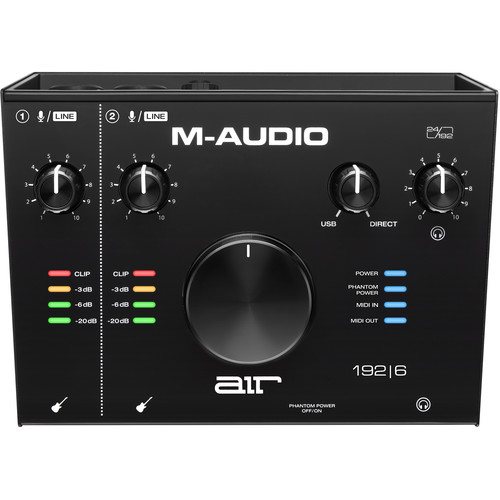
Today, M-Audio somehow currently holds the leading spot in this most competitive range of entry-level models for beginners.
Their Air 192 Series has been met with so many positive reviews and sales, that it has clearly become a game-changer in the market.
Notable features of the interface include:
- 2 XLR/TRS combo inputs – which is perfect for solo artists who sing/play guitar…for example.
- A Powerful Preamp – Capable of driving heavy dynamic mics such as the popular SM7B used by podcasters
- Extremely quiet preamps – which allow for crystal clear recordings
- Very low latency – which allows you to monitor your playing with effects added, without hearing a weird delay in your headphones
It also comes in 4 different sizes, depending on your I/O count needs.
As a solo musician, YouTuber, or podcaster first starting out, there’s really no better option than this one. Check it out:
- M Audio AIR 192|4 – (Amazon/Sweetwater/Thomann)
- M Audio AIR 192|6 – (Amazon/Sweetwater/Thomann)
- M Audio AIR 192|8 – (Amazon/Sweetwater/Thomann)
- M Audio AIR 192|14 – (Amazon/Sweetwater/Thomann)
And for a good alternative in this category, also check out the Focusrite Scarlett Solo (which is actually the highest-selling interface ever).
- Focusrite Scarlett Solo – (Amazon/Sweetwater/Thomann)
Up next…
A Minimalist Interface for Mobile Studios
As mobile studios become increasingly common these days…
The demand for an extremely compact setup is as high as it’s ever been.
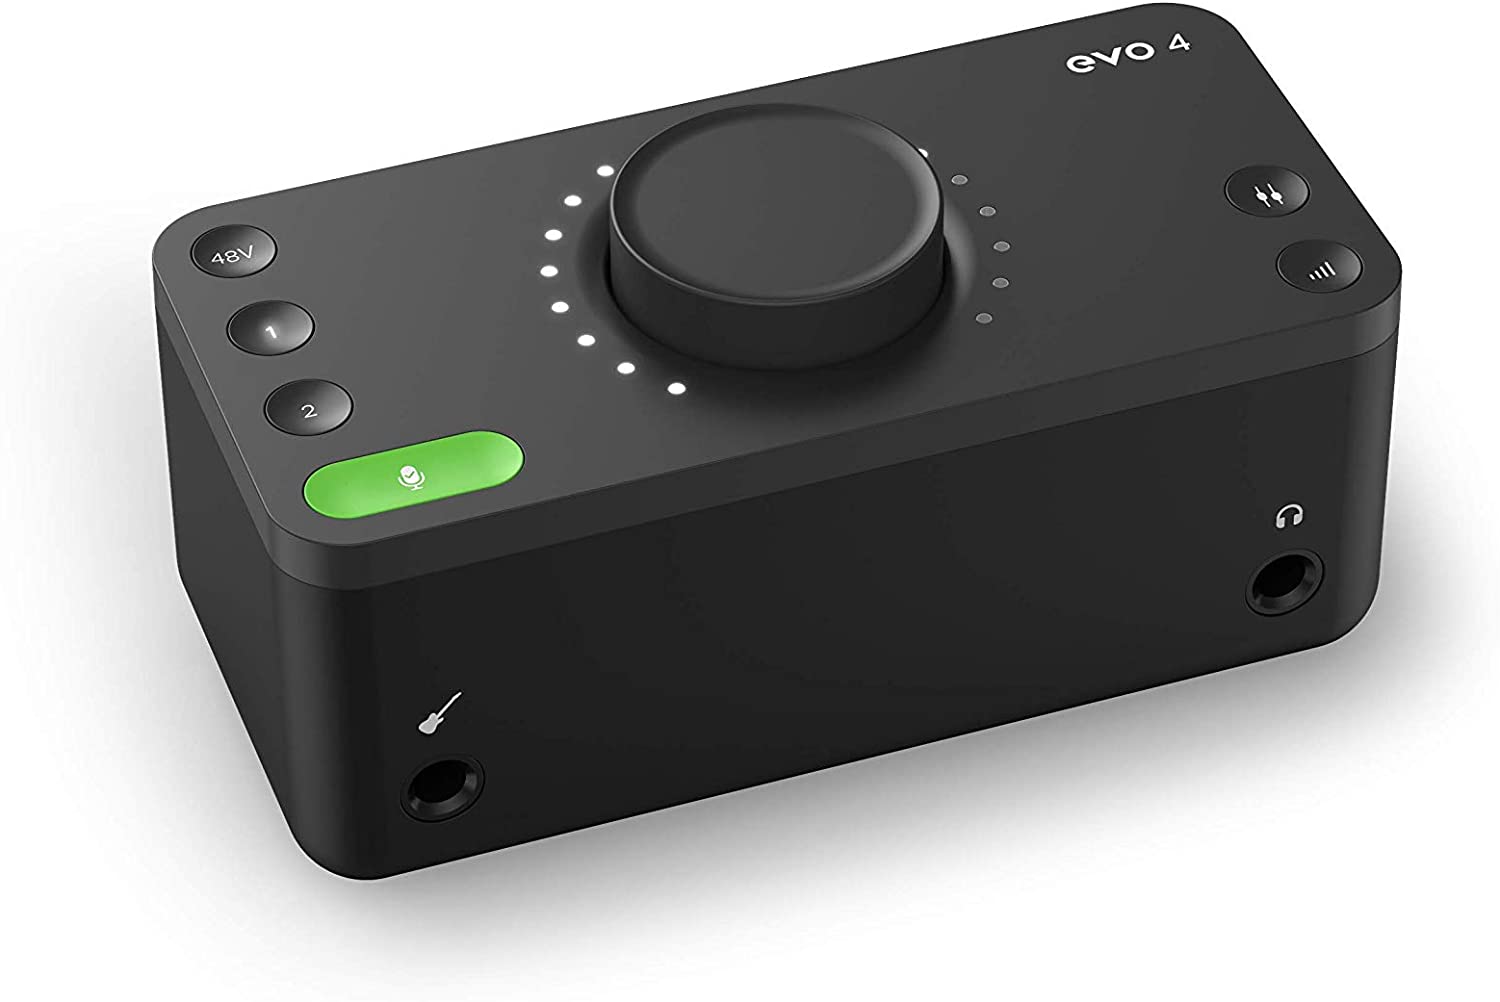
And as you can see from the picture, the Audient Evo 4 clearly meets that demand perfectly.
Notable features of this audio interface include:
- An Unusually Powerful Headphone Preamp – which can easily drive very high impedance headphones such as the Sennheiser HD 650
- Smart Gain Feature – which automatically sets the right gain level for your voice or instrument, without you having to adjust any settings (it works surprisingly well)
But ultimately the biggest perk of this interface is its ridiculous simplicity and portability. If that’s what matters most to you, this interface may be exactly what you’re looking for.
Check it out:
- Audient Evo 4 – (Amazon/Sweetwater/Thomann)
For additional I/O, check out the Evo 8 with 4 ins and 4 outs:
- Audient Evo 8 – (Amazon/Sweetwater/Thomann)
Up next…
An 8-Channel Rackmounted Interface for Beginners
While rackmounted audio interfaces are generally thought of as a more advanced tool for semi-pro studios…
There are many beginners on a budget that still need more I/0 than a typical desktop interface can provide.
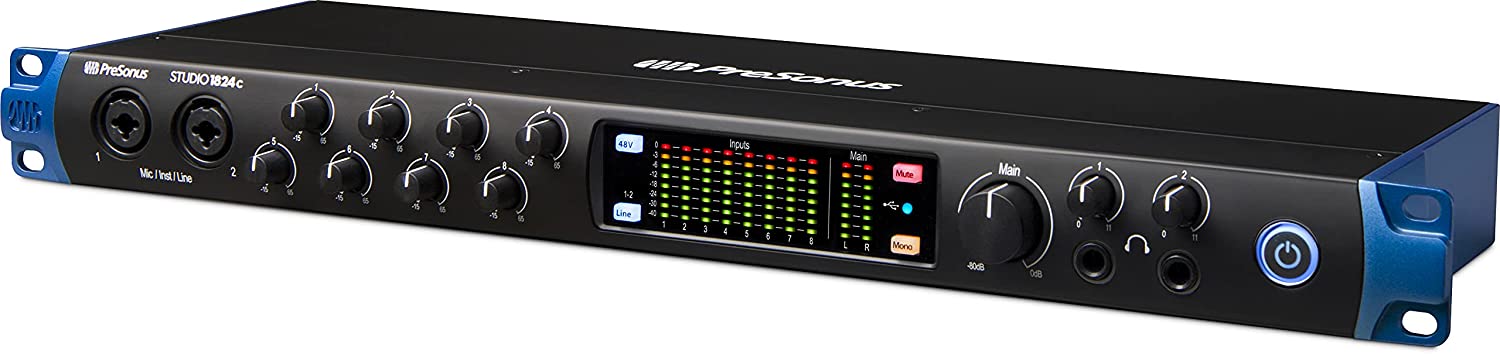
And while it’s rare to find an 8-channel rackmounted interface at the entry-level price range, the one notable exception is the PreSonus 1824c.
As the highest-selling rack interface today, it’s the obvious choice for anyone in need of maximum channels at a minimum price.
This is possible simply because there are none of the fancy features that you might see from some of the other interfaces on this list.
The fact that it’s so popular tells you a great deal about what most musicians today actually want. If you agree with them, this may be the interface for you.
Check it out:
- PreSonus 1824c – (Amazon/Sweetwater/Thomann)
For a similar alternative in this category, also check out:
- Behringer U-phoria – (Amazon/Sweetwater/Thomann)
Up next…
A New Interface from a Legendary Name In Pro Studios
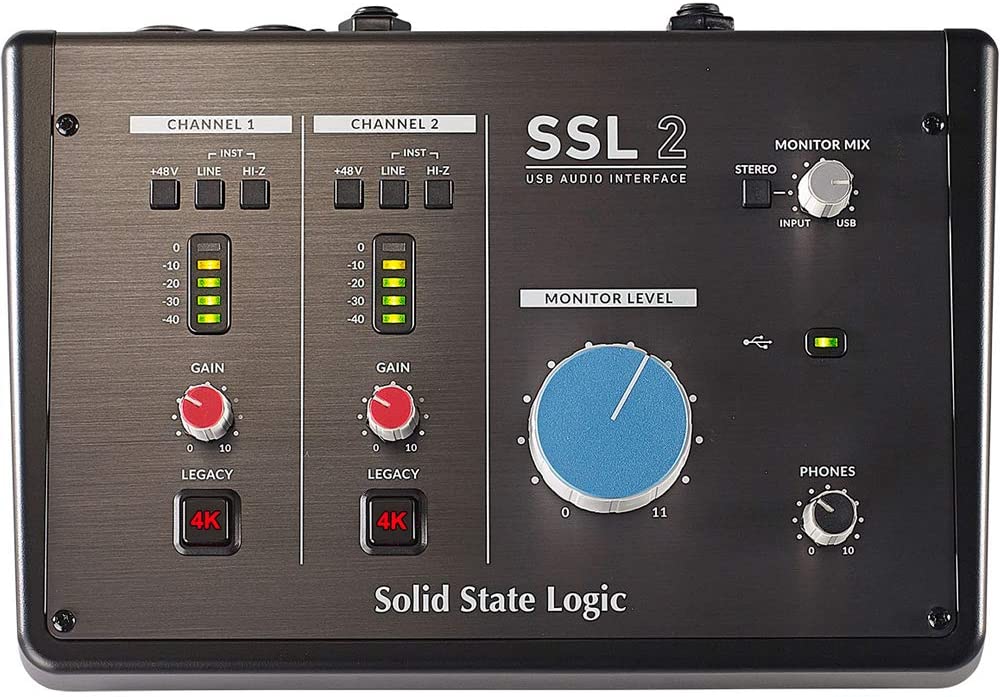
Founded back in 1969, Solid State Logic has been an industry standard in professional mixing consoles for many decades.
Many of their consoles commonly fetch prices of $250k or more. And have been their centerpieces World-famous studios such as Abbey Road Studio in the UK.
Nowadays though, with the rise of home recording studios, SSL has brought their legendary console sound to the consumer market as well, with the SSL2.
One really cool feature of this interface is the 4K Legacy mode, which reproduces the sound of their iconic 4000 console.
Contrary to many of the interfaces on this list, which boast new and unique features, the greatest selling point of this model is its overall performance, including:
- Extremely flat frequency response
- Very high dynamic range
- Low-noise preamp
Check it out:
- Solid State Logic 2 – (Amazon/Sweetwater/Thomann)
For a larger version of this interface with a higher I/O count, check out this model instead:
- Solid State Logic 2+ – (Amazon/Sweetwater/Thomann)
Up next…
Successor to One of the Best Interfaces of All-Time
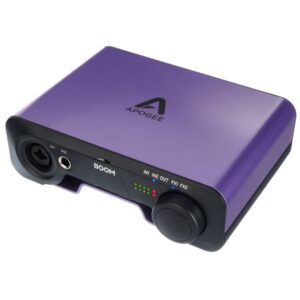
If you’ve been recording for some time now, no doubt you’ve heard of (and probably owned) the Apogee Duet.
As one of the best entry-level audio interfaces ever, it was compact, affordable, easy to use, and had everything you wanted from a small desktop interface.
With their latest release, Apogee aims to do even better this time around, with a number of useful additions. Including:
- DSP Resources – meaning it shares much of the processing working with your computer.
- EQ/Compressor/Saturation Strip – for basic channel processing without the need for any plugins
- iOS App – for easy portable control from anywhere in your studio
And as a bonus, it includes a copy of Ableton Live Lite as well.
Check it out:
- Apogee BOOM – (Amazon/Sweetwater/Thomann)
Next up…
An Interface with the Most Iconic Compressor Ever… Built-In
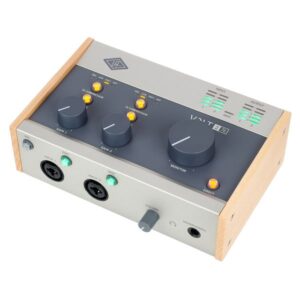
As a top industry-leading manufacturer of today… as well as decades past…
Universal Audio has been making classics for longer than most of us have been alive.
If you’re under 50, you’re probably a bit too young to have heard of their legendary UA 1176 compressor.
Yet you’re no doubt very familiar with many of the classic artists and albums it’s been featured on over the years.
Guns n Roses and Michael Jackson are two big names that come to mind.
And while the original version UA1176 will cost you several thousand dollars… today – it comes included free inside UA’s newest interface series: the Universal Audio Volt.
What’s more, it also includes an absurd amount of FREE bonus software as well (over $400 worth), including both Celemony Melodyne and Ableton Live Lite.
Check it out:
- Universal Audio Volt 176 (1 input) – (Amazon/Sweetwater/Thomann)
- Universal Audio Volt 276 (2 inputs) – (Amazon/Sweetwater/Thomann)
- Universal Audio Volt 476 (2in/4out) – (Amazon/Sweetwater/Thomann)
- Universal Audio Volt 476p (4in/4out) – (Amazon/Sweetwater/Thomann)
Up next…
The New Standard in “Prosumer” Audio Interfaces
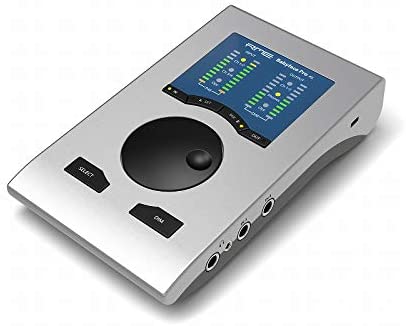
As the line between professional and home recording studios continues to blur…
We see more and more products like the RME BabyFace PRO FS, which deliver pro-level features in a compact desktop body.
According to pretty much the entire internet, it’s the single best desktop interface currently available, with practically zero negative reviews.
Notable features include:
- SteadyClock FS Technology – which makes the interface’s word clock immune to self-jitter and provides a “FemtoSecond Accuracy”.
- iOS compatibility – with its own dedicated app
- TotalMix FX – an advanced routing feature capable of many functions that would normally require a full mixing console.
Check it out:
- RME BabyFace PRO FS – (Amazon/Sweetwater/Thomann)
For an alternative model with similar features, also check out:
Up next…
The Ultimate Audio Interface for Guitarists
Avid’s (Pro Tools) latest release, the MBOX Studio, is an ode to the modern home studio guitarist.
Its new unique features easily make it the best Pro Tools desktop interface ever created.
Designed specifically for guitar players, it includes useful features such as:
- Hi-Z (impedance) with built-in re-amping
- Built-in tuner
- Expression and footswitch inputs
- Dedicated FX loop channels
Other notable connections include:
- New I/0 – SPDIF/Optical, variable impedance mic/instrument inputs, Bluetooth stereo in/out
- Advanced Monitor Control – you can control 2 sets of stereo monitors
- MIDI I/O – to connect your keyboards and synths
It also comes bundled with a 1-year subscription to Pro Tools Studio.
If you use Pro Tools and you play guitar, it’s the obvious choice
Check it out:
- Avid MBOX Studio – (Amazon/Sweetwater/Thomann)
For a pocket-sized instrument interface from a renowned name in the industry, check out the Apogee Jam X:
- Apogee Jam X – (Amazon/Sweetwater/Thomann)
Up next…
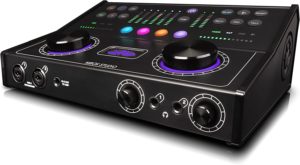
A Legendary Professional Interface in a Compact Format
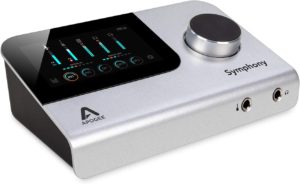
These days, Apogee’s Symphony line of audio interfaces are basically a cornerstone of every pro studio.
They’re widely regarded as possibly the best-sounding interfaces ever created for professional studios. But they’re not cheap.
Luckily for us, Apogee developed a high-end desktop interface that is realistically affordable, yet still boasts many of their most impressive features.
These include:
- An Easy-to-Use Touchscreen
- DSP processing with integrated pre-amps
- Large touch display and convenient big knob
- Extra optical ins and outs
- Legendary circuitry and converters form the pro Symphony series
Check it out:
- Apogee Symphony – (Amazon/Sweetwater/Thomann)
And if you’d rather go for a full-on rack version, here are the links to those:
- Apogee Symphony Mk2
- 2X6 – (Sweetwater/Thomann)
- 8X8 – (Amazon/Sweetwater/Thomann)
- 16X16 – (Amazon/Sweetwater/Thomann)
By the way, if you found this post useful, I highly recommend joining our free Home Recording Secrets email newsletter where you’ll discover….
- How to Get Your First Studio Up and Running in a Single Weekend
- How to Avoid Wasting Thousands of Dollars on Unnecessary Pointless Purchases
- How to Get a “Million Dollar” Pro Studio Sound in a “Thousand Dollar” Home Studio
- PLUS… All Sorts of Other Amazing Insider Secrets Revealed
And it’s totally FREE! Click here and Enter Your Email to Sign Up.