
Every player at some point in their life, dreams at the thought of holding a guitar slide in their hand.
Because the fact is, slide players are just cool as hell…regardless of whether or not blues is your thing.
Luckily, since they’re an extremely cheap accessory, there’s really no reason any guitar player can’t at least give it a shot.
And if you’re reading this article now, I assume that’s your goal. And so to help you with that goal, I have for you today: The Ultimate Guide to Guitar Slides.
The Types of Slides We WON’T Cover

You might be vaguely familiar with slide-specific instruments such as:
- lap steel guitar
- pedal steel guitar
- resonator
But in this post, we WON’T be covering any of these.
Instead…we’ll limit ourselves to casual slide-playing on standard electric and acoustic guitars.
Which means we’ll focus specifically on standard pipe-shaped slides…
And ignore all tone bars , which are typically used on horizontally positioned instruments such as the one shown above.
Now let’s continue…
The 4 Guitar Slide Features to Consider
The ideal slide comes down to a combination of 4 factors:
- Proper Fit
- Hardness
- Weight
- Wall Thickness
So first up…
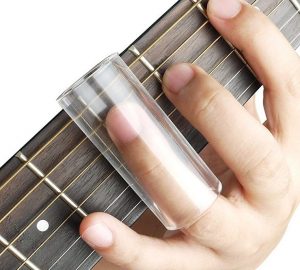
1. Proper Fit
The first step to find a properly-fitting slide is deciding which finger to hold it with.
Initially, you’ll probably find the ring finger most comfortable to use…as it allows you to use both your middle and pinky fingers for support.
However…
Though harder at first, it’s preferable to learn using your pinky, because it leaves your other 3 fingers available for chords and fretting.
Once you’ve committed to a finger…
The next step is finding a slide that fits just snuggly enough over the first two joints of your finger, so that it won’t fall off when hanging downward, and can be manipulated without assistance from your adjacent fingers.
Unfortunately, finding the PERFECT size can be quite difficult, so one smart “hack” is to cover the interior of a larger slide with rubber or leather lining to create a custom fit.
Finally, you should also make sure that length of your slide “fits” the width of your fretboard. A standard slide should be just long enough to cover all 6 strings, but no longer.
Got it? Moving on…
2. Weight
As a general rule of thumb, heavier slides have:
- more volume
- more sustain
- less string buzzing
- warmer tones
And while #4 is more of a preference, the first 3 are all clearly good things.
However, there’s a trade-off…
Because heavier slides are also more difficult to manipulate, especially with lighter strings or a lower action, as you can easily press too hard on the strings, and bump into the fretboard.
So some experimenting must be done in order to find a good balance for both your hands and instrument.
But here’s a good starting point:
- electric guitars – generally work better with lighter slides for easier manipulation, because volume, sustain, and brightness can be adjusted elsewhere with effects.
- acoustic guitars – generally require heavier slides, because they rely on their own natural acoustics for volume and sustain.
Up next…
3. Wall Thickness
The thicker the wall of the slide, the more weight it carries. That part’s obvious, right?
But here’s what not:
Thinner walled slides are easier to play because your fingers are closer to the actual strings, which essentially allows you to “feel” them more.
This is another reason why electric guitar players are more likely to choose lighter/thinner slides, as their effects chain allows them to be concerned more with playability, and less with tone.
Got it? Moving on…
4. Hardness
While any type of smooth hard material CAN work as a slide…
There’s a specific “window” of hardness that gives you the ideal range of sounds that slide players typically look for.
- TOO SOFT – and the sustain will be too short, as the vibrations will get absorbed and the note will die out quickly.
- TOO HARD – and there will be too much string noise, resulting in an irritating mess of high frequencies.
With anything in between though, what you generally find is a solid sustain, with a pleasing tonal balance.
Up next…
Common Guitar Slide Materials

The ONE factor that ultimately determines the hardness, weight, and general playability of your slide is…
The material it’s made from.
The most common materials in slide-making are:
- Glass
- Metal
- Ceramic
Each one has its own pros and cons…so let’s compare them now, shall we?
Starting with…
1. Glass Guitar Slides
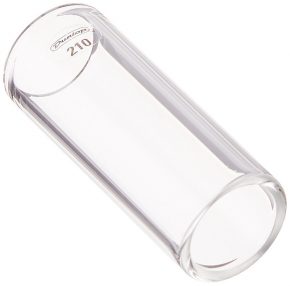
Back in the day, when all slides were cut from the tops of wine bottles…
Glass was the one and only option.
The softest and lightest of all materials…
Glass has the warmest tone, and the shortest sustain.
Since its texture is the smoothest, it also glides easiest across the strings.
However, glass is obviously fragile as well, and can break if dropped.
While you will likely prefer the smoother sound of glass on acoustic guitar, you want to stick to the thicker walled models so that you still get an adequate amount of volume and sustain.
With electric guitars though, you have much more flexibility.
Here are a few of the more popular glass slide models I recommend checking out:
- Ernie Ball Glass – (Amazon/Thomann)
- Dunlop 210 – (Amazon/Thomann)
- Dunlop DT01 – (Amazon)
- The Rock Slide – (Amazon/Thomann)
Up next…
2. Steel/Brass Guitar Slides
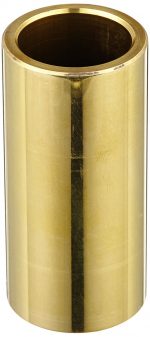
Compared to glass, metal slides are harder and heavier…
Resulting in a sound that is both brighter and harsher, with a longer sustain.
Which is why they tend to be the slide of choice for electric guitar in the rock n roll/blues genres.
As a side benefit, they are also much more durable than glass.
The two most popular metals are steel and brass…
Brass being slightly denser and softer than steel, resulting in a slightly louder, yet darker sound, with a similar sustain.
Here are some of the most popular slides for each metal:
Brass:
- Dunlop 222 – (Amazon/Thomann)
- Dunlop 224 – (Amazon/Thomann)
- Rock Slide – (Amazon/Thomann)
- D’Addario Rich Robinson – (Amazon)
Steel:
Up next…
3. Ceramic Guitar Slides
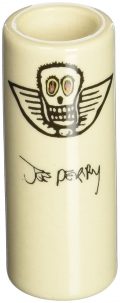
As one of the newer developments in slide technology…
Ceramic slides are generally thought as a good compromise between glass and metal.
- The weight, hardness, and texture are all somewhere in between..
- So the sustain, tone, and glide are all in between as well.
Exactly where in between depends on the exact mixture used the ceramic. Certain ones can be harder and grittier, while others can be softer and smoother.
The biggest downside of ceramic though, is that it can be even more fragile than glass. So be careful not to drop them.
But for newbies who aren’t quite sure what they prefer yet…many sources will argue that a ceramic slide is the ideal starting point.
Here are some of the more popular models to check out:
- Dunlop Joe Perry – (Amazon/Thomann)
- Dunlop Rev Willy – (Amazon)
- Dunlop Mudslide – (Amazon/Thomann)
- Dunlop Moonshine – (Amazon)
And finally, to conclude this post…
Specialty Guitar Slides
With most slide newbies, common advice states to stick to one of the standard slide options when you’re first starting out…
However…
Since most are only interested in slides as a “special effect” rather than a dedicated style of play…
It DOES make sense to also check out some of the more unusual slides that can be easily overlooked.
For example:
- There’s reversible slides such as the Jetslide, and the Shubb AX, which allow you to switch back and forth between slide and normal play simply by flipping it backwards.
- There’s flared slides (which are actually quite popular) such as the Dunlop Harris that conform to the natural curvature of the strings over the fretboard.
- There’s partial slides such as the Dunlop Shy Slide which are specifically designed on cover less than all 6 strings.
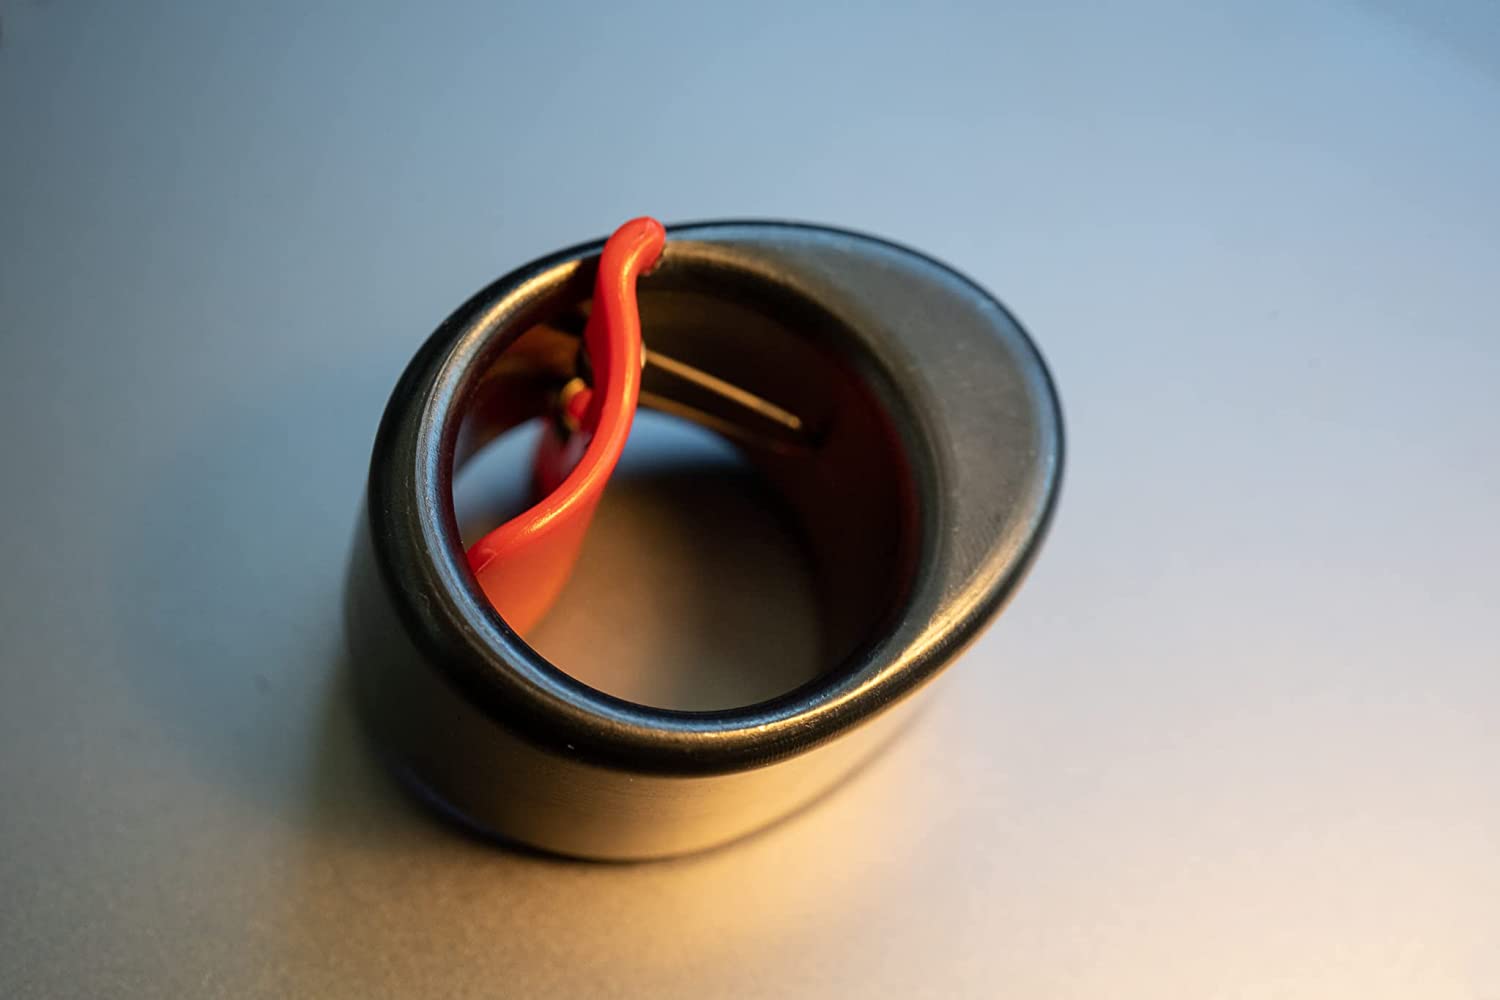
And then there’s the Black Mountain Slide Ring which brings a whole new design to the slide since it is, well, a ring.
But this isn’t just some gimicky gadget. As a matter of fact it brings all sort of improvements to the classic design such as:
- Much lighter than a regular slide but won’t fall off thanks to a special mechanism
- Can be kept your whole playing through without interfering with non-slide playing parts
Here are the links to everything I mentioned above:
- Jetslide – (Amazon/Thomann)
- Shubb AX – (Amazon/Thomann)
- Dunlop Harris – (Amazon/Thomann)
- Dunlop Shy Slide – (Amazon)
- Black Mountain Slide Ring – (Amazon/Thomann)
By the way, if you found this post useful, I highly recommend joining our free Home Recording Secrets email newsletter where you’ll discover….
- How to Get Your First Studio Up and Running in a Single Weekend
- How to Avoid Wasting Thousands of Dollars on Unnecessary Pointless Purchases
- How to Get a “Million Dollar” Pro Studio Sound in a “Thousand Dollar” Home Studio
- PLUS… All Sorts of Other Amazing Insider Secrets Revealed
And it’s totally FREE! Click here and Enter Your Email to Sign Up.
More Guitar Posts in This Series:
Electric Guitar | Acoustic Guitar | Bass Guitar | Amps | Pedals | Cables | Pickups | Bass Strings | Bass Amps | Bass Pickups | Classical Guitars | Acoustic Pickups | Direct Boxes | Cases | Picks | Slides | Straps | Tuners | Stands | Strings | Capos | Tabs | Guitar Accessories