
Once you’ve solved the problem of assembling a basic working studio…
The next question becomes: How do you use it to record instruments?
Because often, what works in pro studios, doesn’t work so well in home studios…
Where a lack of gear often forces us to invent creative shortcuts.
And that is why, for today’s post…
I explain several practical home recording methods for the 5 most common musical instruments:
- Electric Guitar
- Bass
- Acoustic Guitar
- Keyboards
- Drums
(Click here to learn about vocals.)
How to Record Electric Guitar

The simplest method to record electric guitar is:
You take a mic that works well on electric guitar, place it up against your guitar cabinet, and press record.
However, in practice, pro studios often take it much further by using:
- a combination of amps,
- with a combination of mics,
- positioned in multiple spots,
- blended together using their own “secret recipes”
But since few home studios have the gear for these advanced techniques…
Here’s what they do instead:
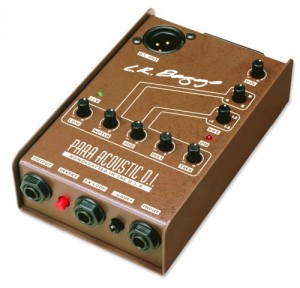
1. Recording with a Direct Box
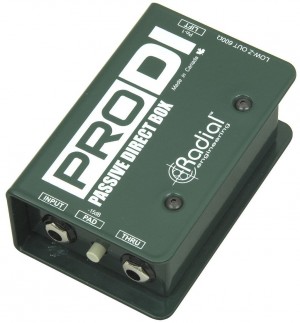
By plugging your guitar into a direct box (such as the one pictured)…
You convert the hi-z guitar signal into a low-z mic signal…
Which can then be recorded directly into your DAW as a dry track with no effects.
To build effects, an amp simulator is inserted on the track, which is essentially a virtual version of your guitar rig.
Compared to the “traditional” way of guitar recording, this method is:
- cheaper,
- quieter,
- requires less space, and…
- offers more sound options
Since most audio interfaces now come with DI inputs included, chances are you wont even need to buy one.
If not, check out this article to see which direct boxes I recommend:
For amp simulators, I recommend:
And for the ultimate all-in-one solution that includes DI inputs, virtual amp tones, AND Pro Tools software, there’s this:
Now despite its advantages, most people agree that even the best amp simulators still don’t sound quite as good as the “real thing“.
Which is why some home studios still prefer the traditional method of…
2. Miking the Guitar Cabinet
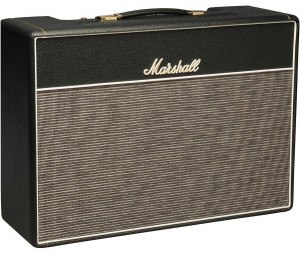
For the best shot at getting that “studio quality” sound…
There’s no substitute for putting a good mic to a good amp.
So here’s the basics on how it’s done:
First there’s the mic…
Many people prefer a mic specifically designed for recording guitar cabinets, such as the Sennheiser e906 – (Amazon/B&H/Thomann).
However any good dynamic mic or ribbon mic will do just fine
Here are the ones I recommend:
Next comes positioning…
Start by placing the mic up against the cabinet, facing the cone. From there, experiment with small adjustments in distance and angle until you find a spot with a good tone.
Another technique is to reposition the amp itself by:
- tilting it to minimize the phase cancellation from reflecting walls
- placing it on a riser to eliminate acoustic coupling with the floor
- changing its room location to tweak ambience
With a little bit of patience, and a lot of experimenting, you can get a surprisingly good tone using just these simple techniques.
Up next, here’s one final method of recording guitar that’s a combination of the first two…
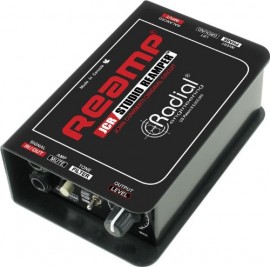
3. Re-Amping
If you want the sound of a real guitar amp…
Yet prefer the flexibility of amp simulators…
One way to have both is with a tool known as a reamp…
Which works by converting the line-level output from your interface into a guitar signal, which travels through a second guitar cable, that is then fed back to your amp.
The first benefit of this method is, you can compare and blend both the “real” and “simulated” versions, to find the best possible tone.
The second benefit is, you can still tweak the tone of the amp, and re-record the track, long after your guitarist has gone home.
To try it out, here are 2 good options I recommend:
Up next…
How to Record Bass Guitar
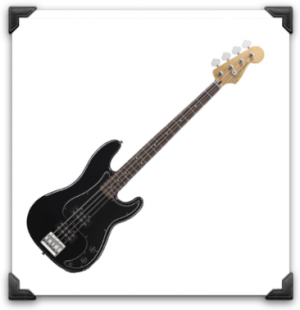
The nice thing about bass guitar is…
At home, you can record it using the same basic methods as those used in electric guitar…
…with just a few small differences.
First there’s the mics:
Rather than using a standard dynamic mic…
Bass cabinets are often recorded using special bass mics, with responses tailored to low-frequency instruments.
Here are the ones I recommend:
Next there’s the direct box:
Depending on your style of bass, you’ll have either passive or active pickups.
The general rule of thumb here is:
- Passive basses use active DI’s
- Active basses use passive DI’s
Once again, here’s the link to help you find what you need:
And finally, there’s the amp simulator:
While most amp simulators do include few bass settings, here’s one designed SPECIFICALLY for bass:
Once you’ve got these covered, you’re all set.
Up next…
How to Record Acoustic Guitar

Despite its beautiful simplicity…
What many folks don’t realize is…
Acoustic guitar is one of the most sonically complex musical instrument of all.
Because besides the actual notes…
The sound of the instrument also includes:
- the pick strumming the strings
- your fingers squeaking the strings
- your hand muting the strings
- your palm tapping the soundboard
- the strings tapping the frets
While it’s not always necessary to record acoustic guitar to that degree of detail…it is necessary sometimes.
In a moment I’ll show you how. But first, the easier methods…
1. Acoustic DI Recording
Since room acoustics play a BIG role in acoustic guitar recording…
And most home studios have less-than-awesome acoustics…
A simple way to side-step this problem is to record with an acoustic DI in place of a microphone.
The main differences between an acoustic DI and standard direct box are:
- the input impedance is much higher to match the output of piezo-electric pickups
- the sound offers more high-end, to capture the high-frequency detail of the acoustic guitar
To try this method, here are are a few good acoustic DI’s I recommend:
Up next…
2. Mono Recording with a Mic
While acoustic DI recording can work for a home studio to-an-extent…it’s still no substitute for a good acoustic guitar microphone.
And so…
Assuming you have a room fitted with acoustic treatment…here’s how you perform this next method:
First, there’s the mic. The standard option for recording acoustic guitar in MONO is:
- a condenser mic (either large or small diaphragm)
- with an omnidirectional polar pattern
The reason is…
- Condenser mics are better than dynamic mics at capturing the high-frequency detail of the instrument.
- Omnidirectional mics are better than cardioid mics at evenly capturing wider sound sources.
Next, there’s positioning:
Start with the mic about a foot away from the guitar, pointing toward the 12th fret. From there, experiment with small changes in angle and distance until you find a good sound.
In nice-sounding rooms, move the mic further back to capture more room ambience. In poor rooms, move it closer to capture less.
While this should produce a noticeably better result than DI recording, it still won’t be nearly as good this last method…
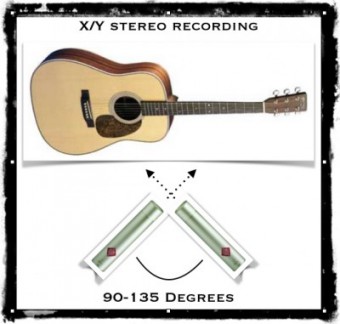
3. Stereo Recording
So many people struggle for months at a time…
Confused as to why their acoustic guitar tracks don’t sound nearly as good…
As those on their favorite records.
Because what no one told them is…
Stereo recording is the secret weapon engineers use to capture BOTH:
The wide stereo image, and broad sonic spectrum present in all those “professional-quality” acoustic guitar recordings.
In sparse mixes especially, where acoustic guitar and vocals must fill out the entire song…this technique is a MUST.
Since stereo recording is a HUGE topic in itself, here’s a separate article explaining how it’s done:
Moving on…
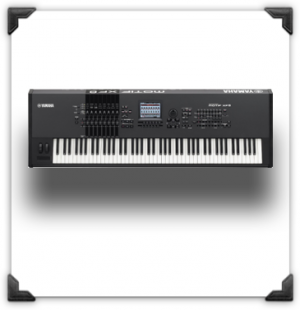
How to Record Keyboards
The great thing about keyboards is…
Because it’s a digital instrument…
It’s far simpler to record than anything involving a microphone.
There are only 2 ways to do it, and both methods are relatively straight-forward.
The first is…
1. Stereo DI Recording
If you’re an actual keyboard player…and you own a good keyboard, with a solid selection of sounds…
You probably want to take advantage of those sounds by recording the direct analog outputs, right?
The only problem is…
The line-level connections on most keyboards have extremely high-outputs, which can easily clip when recorded through a standard mic preamp channel.
That is why, the best solution is to first run it through a direct box, just as you would with a guitar.
The only difference is…since keyboard outputs are stereo, you’ll need a stereo DI.
So here are a few good ones I recommend:
Up next…
2. Virtual Instruments Keyboards
For the rest of you “multi-instrumentalists“, who use keyboards on occasion…
But don’t really consider yourselves “keyboard players“…
A virtual instrument, in combination with a MIDI controller, offers a far better recording solution, for the following reasons:
- It’s far cheaper than a good digital piano
- It offers better editing features for “sub-par” performances
- It allows you to change tones at any point during the mix
That is why, if you suck at keyboards, but need a good way of “faking-it” from time to time, virtual instruments are what I recommend.
Up next…
How to Record Drums
As I’m sure you already know…
Drums are quite possibly the single-hardest-instrument to record in a home studio.
Because doing so requires:
- Lot’s of Equipment – including multiple drum microphones, stands, and input channels.
- A Big Room – with enough space to fit all that gear, and good acoustics for that nice “live” sound.
- Physical/Acoustic Isolation – so you can make noise without annoying your neighbors.
Since few project studios have these luxuries…here’s what many use instead:
1. Virtual Instrument Drums
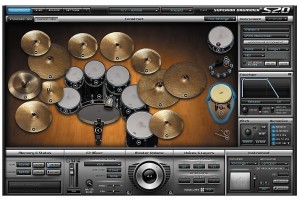
These days, virtual instrument drums are capable of producing drum tracks so real…
You’ll swear you’re listening to a real drummer.
And that’s because…
Every sample in the software was recorded in a pro studio, on a world-class drum kit, by real session drummer.
So not only is it easier than recording real drums…in many cases, it actually sounds better as well.
And for a small project studio, it is by far the best option.
Here are 3 good ones I recommend:
- EZ Drummer – (B&H/Thomann)
- Toontrack Superior Drummer – (Amazon/B&H/Thomann)
- Steven Slate Drums – (B&H/Thomann)
Up next…
2. Electronic Drums
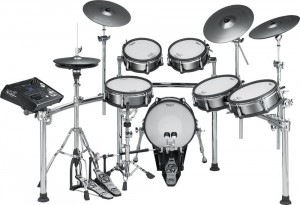
With a “brain” module far more sophisticated than any virtual instrument…
And hardware so realistic you may as well be playing acoustic drums…
Electronic drum kits (the good ones anyway), are in my opinion, the ideal solution to record this instrument in a home studio.
- They’re quiet enough to play without bothering your neighbors.
- They offer a ton of kits to choose from.
- The good ones sound absolutely amazing.
- The best ones let you record each drum to a separate track, just like with acoustic drums.
To see which ones I recommend, check out this article:
Now despite the awesomeness of electronic drums, they’re still not quite as good as “the real thing”.
So up next…
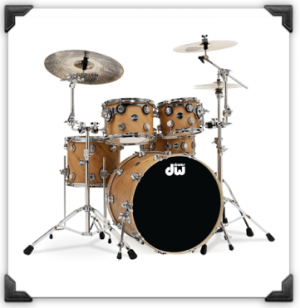
3. Recording Acoustic Drums
The truth is, an entire book could be written on this one subject alone. For today though, here’s the super-condensed version for beginners.
First, there’s the mics…
On cymbals, you use condenser mics, and on drums, you use dynamic mics.
If you’re still building a mic collection, here are some good ones I recommend for each piece of a standard kit:
- Kick – AKG D112 (Amazon/B&H/Thomann) or any good bass mic
- Snare – Shure SM57 (Amazon/B&H/Thomann) or any good dynamic mic
- Toms – Sennheiser e604 (Amazon/B&H/Thomann) or any good dynamic mic
- Hi-Hats – Shure SM81 (Amazon/B&H/Thomann) or any good small diaphragm condenser mic
- Cymbals/Room – any good matched pair of condenser mics like the
Next, there’s the positioning…
While varying opinions exist on exactly how this should be done, here are some of the basic underlying strategies:
- On individual drums – the mics are positioned right along the rim, at a downward angle, as close to the drum head as possible without getting in the drummer’s way. If possible, angle it AWAY from adjacent drums to minimize bleed.
- On kick drums – two mics are sometimes used on the front and back to capture both the low-end thump and click of the beater.
- On snare drums – two mics are sometimes be used on the top and bottom to capture both the crack of the drum and rattle of the snare.
- On toms – each drum can be miked individually, or they can be recorded with a pair of stereo room mics instead.
- On cymbals – the same is true as with toms…although the more important cymbals (hi-hat and ride) usually get their own mics.
Anyways…that’s the general idea.
However, in all honesty, the vast majority of home studios will be much better-off recording drums using one of the first two methods instead.
But hey, it’s still good to know, right?
By the way, if you found this post useful, I highly recommend joining our free Home Recording Secrets email newsletter where you’ll discover….
- How to Get Your First Studio Up and Running in a Single Weekend
- How to Avoid Wasting Thousands of Dollars on Unnecessary Pointless Purchases
- How to Get a “Million Dollar” Pro Studio Sound in a “Thousand Dollar” Home Studio
- PLUS… All Sorts of Other Amazing Insider Secrets Revealed
And it’s totally FREE! Click here and Enter Your Email to Sign Up.