
Want to learn how to record better vocals at home?
For beginner home studios, it’s one of the first and most common frustrations they face.
Yet once you know just a few insider secrets that usually take people years to learn on their own…
You can significantly improve your sound in almost no time at all.
So in this post, I’m going to reveal to you 8 of the very best industry tips to help bring your game to the next level, and record better vocals at home.
First up…
Finding the Right Tools for the Job
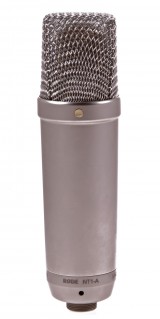
Like with any task, the first step to doing things right is making sure you have the right tools.
If you don’t have a working studio just yet, here’s a post that will help get you started:
If you already have a studio that you’re using, the next thing I’d recommend to record better vocals at home a dedicated vocal microphone.
To see which ones I recommend, check out this article:
Up next…
The 5 Biggest Problems That Ruin Vocal Recordings
Surprisingly, good vocal recordings don’t require any super fancy techniques. All you need to do is avoid the common problems.
So up next, we’ll discuss the 5 most common ones, starting with…
The #1 Issue With At-Home Vocal Recordings
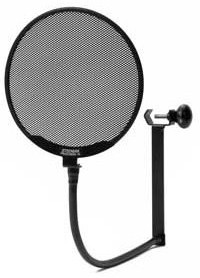
When pronouncing “P” and “B” sounds, most mouths emit a strong blast of air.
In normal speech you don’t even notice it. But on recordings, those air blasts strike the diaphragm of the mic, creating an annoying low frequency sound known as Popping.
To understand it better, try this exercise: Place your hand in front of your face as you say these two sentences:
- Peter Piper picked a peck of pickled peppers.
- Better businesses build big boxes.
Feel the air hitting your hand? That’s popping. Now here’s the trick to avoiding it:
Simply have the peformer sing/speak into the mic at a slightly off-axis angle (30-45°), so the blasts don’t strike the diaphragm directly.
In addition, you can also add a pop filter to catch any remaining air blasts before they hit the microphone.
To see which pop filters I recommend, check out this article:
Up next…
Sibilance: What You Need to Know
When pronouncing “S” and “F” sounds, the human mouth often emits a high frequency blast of air, commonly known as sibilance.
Just like with popping, you don’t really notice it in everyday conversation, yet it’s painful to listen to when recording vocals at home.
To hear it in action, let’s do another test:
Using a condenser mic (which is more prone to sibilance), record yourself reciting this line:
- She sells sea shells by the sea shore.
Now listen back and pay close attention to the “S” sounds. That annoying hiss is sibilance.
To fix this problem, many engineers will attempt to mask it with software tools like de-essers and multi-band compressors. But it’s far better to avoid recording it in the first place.
Just like with popping, singing at an off-axis angle (30-45° will fix most of the problem. If that’s still not enough, try the pencil trick:
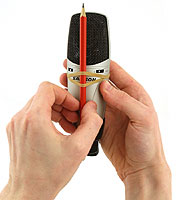
To do it, simply grab a pencil, and secure it directly over the diaphragm of your mic with a rubber band, as shown in this picture.
Those high frequency blasts will now be split in half by the pencil, and diverted off to the side. It may not look beautiful, but works surprisingly well.
Up next…
Proximity Effect: The Pros and Cons

Due to the design of cardioid mics (the standard polar pattern for vocals)…
The mic exhibits a low-frequency boost when the vocalist gets really close to the mic.
This is known as proximity effect. The closer the sound source, the stronger the effect.
Unlike popping and sibilance, which ALWAYS cause problems, proximity effect can be either good or bad, depending on whether or not it’s used intentionally.
With certain instruments (including vocals), this can serve as a useful tool in adding warmth.
However, when inexperienced singers use it unintentionally, it can be extremely annoying to hear that low end boost appear and disappear at random.
So here are two potential solutions
- Use a pop filter – to mark a distance, and prevent the singer from getting too close or too far from the mic.
- Use omnidirectional mics – which are immune to proximity effect because of their design.
Up next…
The Arch Enemy of At-Home Vocal Recordings

More so than any other tip in this post, improving your room acoustics is the key to recording better vocals at home.
And the standard tool for improving room acoustics is of course, acoustic treatment.
So if you don’t have any yet, make it a top priority. Here’s an article to help you get started:
The truth is though, a proper acoustic treatment setup can be quite expensive and time consuming.
So many home studios that only record vocals will simply use a reflection filter instead. They may not work as well as real acoustic treatment…but they’re a thousand times better than nothing at all.
To see which ones I recommend, check out this article:
Up next…
What to Do If Your Singers Like Tapping Their Feet
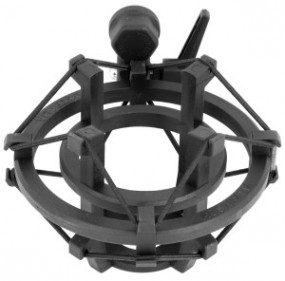
With certain types of home flooring, footstep vibrations can travel up your mic stand, and onto the recording.
This can be especially problematic with singers who like to tap their feet.
To record better vocals in your home studio, shockmounts work to create acoustic isolation between the mic and the stand, and ultimately the floor.
Since this problem is extremely common, many vocal mics come with a shockmount included.
If yours doesn’t, it can be a bit tricky to find a universal shockmount that will fit yours, but they do exist.
Moving on…
4 Mic Techniques for Better At-Home Vocal Recordings
As a home studio engineer, you can do everything right to set your singer up for success, yet the final product is STILL mostly in their hands.
Even if they’re singing is amazing, if their microphone technique is poor (as most are), the final recording will still be a nightmare to manage in the mix.
Singers with little experience behind a mic will make nervous, fidgety head movements at random, which ruin an otherwise great performance.
Skilled singers on the other hand, make deliberate, purposeful head movements that significantly improve the overall sound.
So here are 4 common techniques I recommend when recording at-home vocals in your studio:
Controlling Volume with Distance
By moving your head to the mic as you get softer, and further as you get louder, you level out your own volume fluctuations.
This dramatically reduces the amount of compression required later in the mix.
Avoiding Popping and Sibilance
By adjusting your angle and distance from the mic, you can virtually eliminate any traces of popping or sibilance.
And you can do it without even using a pop filter.
Purposeful Use of Proximity Effect
By moving in closer to the mic during softer, more delicate passages, you can add a beautiful sense of intimacy to your tone.
Controlling Breath Sounds
By turning your head to the side with each breath, you avoid those awkward breath sounds that must be later edited out.
If youre really good, you’ll know when to intentionally breathe into the microphone between lines, when it sounds natural.
Up next..
How to Coach Your Singers Into Better Performances
Doing all this stuff on your own, as the singer, is already quite tricky. But what on Earth are you supposed to do when recording someone else?
You see the truth is…very few singers you work with will have really good mic technique.
So you’ll almost always need to give them some pointers here and there if you want things to sound their best.
Start first, by explaining the 4 techniques we just covered, and let them practice for a few takes until they start to get the hang of it. It honestly won’t take that long.
If on the other hand, they’re just bad at singing in general, it’s unlikely that any amount of coaching on your part will help much in the near future.
In this case, your best course of action is to stay positive and make him feel confident.
Never ask more than you believe they’re capable of. Unrealistic expectations only discourages singers, making them sound even worse.
So in the short term, it’s much better to have your singer feeling delusionally confident, than objectively insecure.
Which brings us to our final topic…
Should You Use Effects While Recording Vocals at Home?
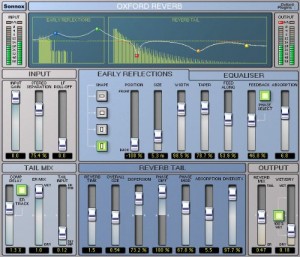
When recording vocals at home, you can either record them dry, so the singer hear’s nothing but their own voice as it actually sounds in the room…
Or you can add effects such as reverb, compression, eq and delay, to give the singer a better idea of how their voice will sound in the context of the mix.
Many singers believe that adding a little reverb helps them stay on pitch. In reality though, I believe most just like it because it makes them sound better.
Which is good, since it buildes their confidence. But it’s also potentially bad, since since any effect you add may also fool the singer into believing their performance is stronger than it really is. And it increases the chance they’ll miss a problem which they might have otherwise heard and corrected themselves.
For example:
- By adding a de-esser, it’s harder to hear and avoid sibilance.
- By adding a high-pass filter, its harder to hear popping.
- By adding a compressor, it’s harder to hear level changes.
- By adding in auto-tune, it’s harder to hear when you’re off-key.
Therefore, if the singer has enough skill to hear these problems and adjust, the best option may be to record them dry, with no effects.
With less-skilled singers who can’t hear these problems anyway, the opposite approach may be more effective.
By the way, if you found this post useful, I highly recommend joining our free Home Recording Secrets email newsletter where you’ll discover….
- How to Get Your First Studio Up and Running in a Single Weekend
- How to Avoid Wasting Thousands of Dollars on Unnecessary Pointless Purchases
- How to Get a “Million Dollar” Pro Studio Sound in a “Thousand Dollar” Home Studio
- PLUS… All Sorts of Other Amazing Insider Secrets Revealed
And it’s totally FREE! Click here and Enter Your Email to Sign Up.