
Once you’ve got a basic collection of gear…the next step in building your recording studio is smart setup and design plan.
Most beginners grossly underestimate the importance of this step.
Because the truth is – a well-designed room can be the difference between smooth sailing and major headaches down the road.
So to spare you a few months of frustration…
In this post, we’ll go through the ENTIRE step-by-step process of setting up your recording room the RIGHT WAY. Follow this simple guide and, you can get it done (if you want) in a single day.
First up…
STEP 1: Choosing the Best Room
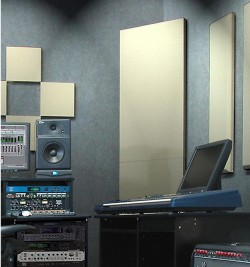
In an average household, you might have the 2-3 room options to choose from.
If you only have one…then use that. Otherwise, you have an important decision to make.
Because certain some rooms are far better for recording than others.
So here’s what you want to avoid:
The Top 4 Recording Studio Design Mistakes
If at all possible, these are the 4 biggest traps to AVOID:
1. Small Spaces
The general rule of thumb here: the bigger the room, the better.
Reason being: big rooms allow not only for more space for your gear, but more space for you and your talent as well.
Not to mention…they sound WAY better (more on that topic later).
2. Noise
In everyday life, it’s easy to forget how much noise is actually around you. But once you hear it through a microphone, all that noise is magnified 100x.
Common sources of noise outside your house include:
- Cars
- neighbors
- plumbing
- birds
- crickets
- wind
- rain
So pay close attention to which rooms are the worst noise offenders, and choose the quietest one with the fewest neighbors.
Also don’t forget that YOU will be a source of noise for OTHERS as well. And you’ll be making a lot more than they will.
Ideally, you want a perfectly silence space where:
- you can make as much noise as you want.
- at any time of the day you want.
But since very few rooms are like that, some degree of soundproofing may be necessary to create a useable workspace for yourself.
3. Unsuitable Flooring
For your recording room floor, the ideally want hard flooring. That could include:
- Concrete
- Tile
- Hardwood
Avoid carpeted rooms if at all possible. For two reasons:
- Studios get lots of foot traffic – so carpet wears out quickly.
- It hurts the acoustics – since carpet absorbs high frequencies, but not low.
If you need carpet for your drum kit, lay down an area rug instead.
Another common problem is excessive foot noise. So if possible, choose a downstairs room with a solid foundation.
Up next…
4. Poor Acoustics
Bedrooms in a typical family home look something like this:
- They’re small
- With low flat ceilings
- And parallel walls made of drywall
Unfortanately all 3 of things are terrible for acoustics.
Instead, a large room with high slanted ceilings, and asymmetrical walls – with lots of irregular surfaces – is perfect. Yet, the chances of accidentally having an available room this perfect is virtually ZERO.
Pro studios have them only because they spent tons of cash to DESIGN them that way.
You on the other hand, probably need to compromise. Don’t expect perfection, just choose your best option.
And you can always improve the room sound later by adding acoustic treatment (we’ll get to that part in a bit).
STEP 2: Clearing Out the Room

Once you’ve chosen a room, next comes the preparation.
Because before we can start adding new things INTO the room, we need to first clear it out. Meaning:
- Clear off all floor space
- Take everything off the walls
- Remove anything that vibrates
If the room also doubles as bedroom, living room, etc – you may not be able to clear it out completely, but remove as much as you can.
All done? Let’s continue.
STEP 3: Adding Some Acoustic Treatment
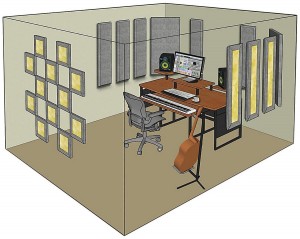
Now that you have an empty room to work with, to work on the acoustics.
In a different post, I show you everything you need to know to design an amazing acoustic treatment plan on virtually any budget.
And here’s an example of the type of package you’ll ultimately need to buy to get started on this task:
Up next…
STEP 4: Arranging Your Workstation
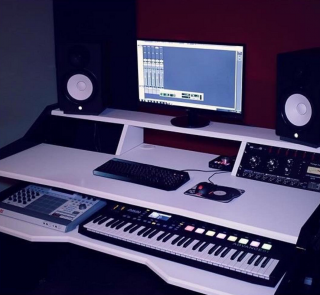
Now that you’ve got an empty room with great acoustics, let’s add some some gear.
Since your desk/chair is the centerpiece of your studio, we’ll start there.
Any desk/chairs you have lying around the house can be used for starters – but ultimately – this is an easy and not-to-expensive upgrade that you’ll want to make ASAP.
For some quick recommendations on what to buy, check out these two articles:
Classic Desk Example: Acme Furniture Eleazar – (Amazon)
Classic Chair Example: Herman Miller Aeron – (Amazon)
Up next…
STEP 5: Arranging Your Stations
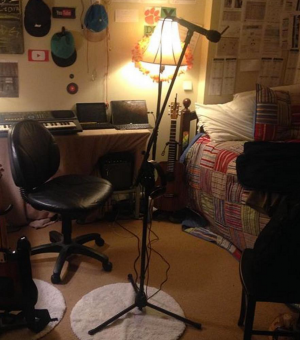
While pro studios have the luxury of multiple rooms – 99% of home studios do everything in just ONE.
In which case – the recording setup is different, and not at all standardized.
Generally though, the idea is to separate the room into TWO stations:
- a desk/mixing area for the engineer (which we’ve already done)
- a recording area for the musicians (which we’ll do right now)
However, while that sort of studio setup works well for recording talent, it’s not so practical for recording just yourself.
So right now, let’s cover some workable solutions for each scenario.
Starting with…
The SOLO Recording Studio Setup
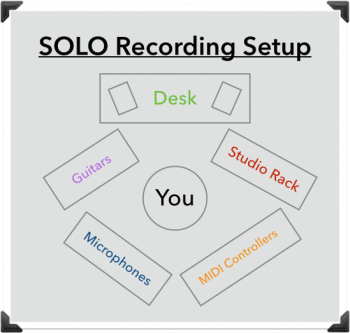
The common strategy here, is to arrange all your gear around you in a circle, as shown in the image.
This allows you to play BOTH engineer and musician from a single location, a switch back and forth with a simple chair swivel.
Now here are the downsides:
- Too much gear around you creates added reflections, which hurts acoustics.
- If the computer is too close to the mics, fan noise can leak onto the recording
- (Most Importantly) It doesn’t work for multiple people.
So up next…
The DUAL Recording Studio Setup
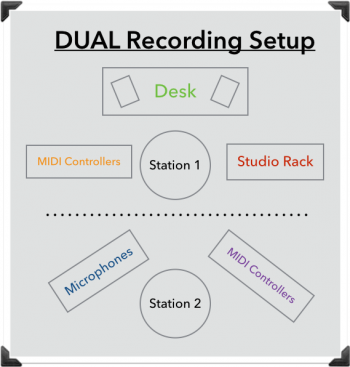
To record with two or more people, divide the room into two stations:
- One for the Engineer – including the mixing desk, and all the standard gear such as an audio interface, studio monitors, etc.
- One for the Musician – including microphones, instruments/MIDI controllers they might use.
Now…once again there’s still a big problem here.
It works great for multiple people, but it doesn’t work AT ALL when recording by yourself.
Because playing both engineer and musician would require you to constantly jump back and forth between stations (which simply isn’t practical).
So up next – the 3rd (and generally best) option:
The HYBRID Recording Studio Setup
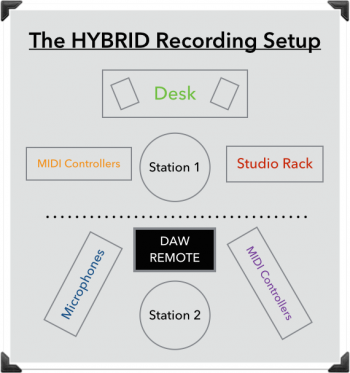
This studio setup offers you the best of both worlds – in both solo, AND group recording.
As you can see, it closely resembles the DUAL setup, but with one KEY addition:
- A DAW Remote – which allows for basic transport controls (record, stop, etc.) while away from your desk.
These days, many DAW’s offer remotes such as these in app form. You probably won’t even have to pay for them.
Just download it on your phone, and you’re good to go.
For starters, check out TouchDAW for Android, which many say is BY FAR the best option of today. Also check out One Control Pro for iOS.
STEP 6: Connecting Your Gear
Since you won’t have much equipment early-on, this part should be pretty simple.
However – things can get complicated quickly, as your studio expands over time.
So to make it all work – you’ll need a solid understanding of how these puzzle pieces fit together.
In recording circles, the concept is known as signal flow, which simply means:
- The path the audio signal must travel through your gear, from beginning to end.
To learn how it all works, check out this post:
Moving on…
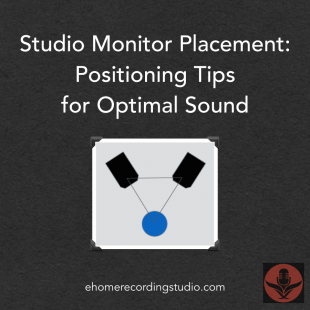
STEP 7: Positioning Your Studio Monitors
Ok so this part’s quite important.
Next to acoustic treatment, it’s probably the biggest factor that determines the end result of your mixes.
A nice expensive pair of studio monitors is only half the battle. The other half is positioning them correctly within the room.
Good positioning is determined by numerous factors including:
- The position of your head
- The position of the walls
- The position of “spot” acoustic treatment
Needless to say…the topic is too big to cover in this article. So I’ve created an entirely separate one that you can see here:
To make this task 10x easier, I’d also recommend a pair of studio monitor stands, which allow for fully-adjustable height, angle, and width.
To see which ones I recommend, check out this article:
Classic Example:
Ok almost done, I promise! Just one more thing…
FOUR Essential Add-Ons For Your Recording Studio Setup
If you haven’t figured it out yet, the entire goal of this post is to make your studio setup as user-friendly as possible.
So I’ll wrap things up 4 cheap and simple acccesories that will make things vastly easier for you – with very little time and effort.
1. A DAW Mount
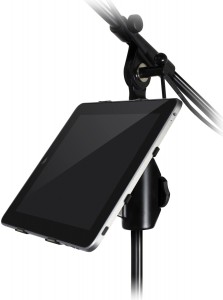
Remember earlier when we covered DAW remotes? Well here’s how you mount them:
ol is the
Simply attach a dedicated mount – such as the IK Multimedia iKlip Expand – to you mic stand it to your mic stand.
This will allows you to precisely position your phone/iPad exactly as you want – no extra stands needed.
Here are some links:
For the iPhone, check out the iKlip Expand Mini instead.
- iKlip Expand Mini for Phones – (Thomann)
Up next…
2. A Headphone Extension Cable
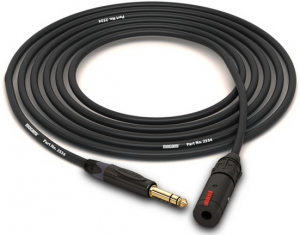
When you work alone, you spend a lot of time moving about the room.
And for most of that time, you’ll likely want to be wearing your headphones.
The problem is – most headphone cables are way too short for that
Solution? A headphone extension cable at least 20 ft long, such as this one.
WARNING: This is super important. Don’t skimp on cost here. Because this cable will be moving around more than any other cable in your entire studio. Which means you want to go as premium as you can, to avoid crackling sounds from flexing and compression.
3. A Secondary Computer Monitor

Alongside your new DAW Remote, a secondary computer allows you the same visual feedback you’d normally get at your desk.
It’s not only great for you when working solo – it’s also just as awesome for your musicians when working with others.
And yes, computer monitors can be ridiculously expensive if you want them to be. But they can also be super cheap as well.
The choice is yours.
Classic Example:
- LG QHD FreeSync Monitor – (Amazon)
4. Virtual Instruments/MIDI controllers
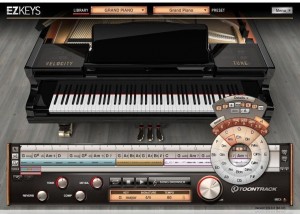
And finally, the hack that allows you to simulate hundreds of different musical instruments – with grand pianos bigger than your entire studio setup….
Virtual Instruments/MIDI controllers.
And the wealth of sounds aren’t the only perk.
They also save you money, space, and including editing features that do a pretty great job at hiding your crappy playing on unfamiliar instruments.
Classic Example:
- Spectrasonics Keyscape – (Amazon)
By the way, if you found this post useful, I highly recommend joining our free Home Recording Secrets email newsletter where you’ll discover….
- How to Get Your First Studio Up and Running in a Single Weekend
- How to Avoid Wasting Thousands of Dollars on Unnecessary Pointless Purchases
- How to Get a “Million Dollar” Pro Studio Sound in a “Thousand Dollar” Home Studio
- PLUS… All Sorts of Other Amazing Insider Secrets Revealed
And it’s totally FREE! Click here and Enter Your Email to Sign Up.