
As the single most important element of acoustic treatment, bass traps are really the ONE thing that no studio can do without.
Because while regular acoustic panels are great at absorbing mid-high range frequencies…
They aren’t very good at handling the low-end, where recording studios experience the worst problems.
This is especially true of those with smaller rooms, and/or larger studio monitors.
The good news is, once you know exactly what to get for your particular room, and how to set it all up, you can pretty much forget about them after that.
So to help you get through this part, in this post I’m going to show you everything you need to know about this all-important element of your studio.
First up…
Porous vs Resonant Bass Traps: What You Need to Know
When we think of bass traps in a recording studio, we typically imagine those thick spongy wedges you stick in the corners of the ceiling.
However those are only 1 of 2 common categories of bass traps used for the purposes of taming rogue bass frequencies that destroy the delicate natural frequency balance of your studio…and ultimately of your recordings.
Now let’s learn more about each of these types now, shall we?
Porous Bass Traps: The Pros vs The Cons
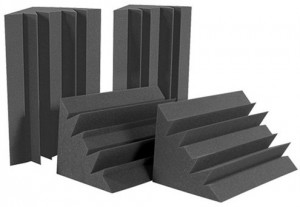
According to standard acoustics theory, Porous bass traps are the first-line-of-defense when tackling general problems with room acoustics.
They can be made not only from acoustic foam, but also from fiberglass, rockwool, or any number of materials with sufficient density.
This density makes them extremely effective at taming the most common small-room problems including:
- room modes
- standing waves
- flutter echo
- speaker boundary interference response
This versatility is mainly due to their excellent broadband absorption, meaning they work well at absorbing frequencies equally across the entire frequency spectrum.
Once again, this preserves the natural frequency balance of sounds created within the room.
However, the biggest flaw with porous bass traps is that they still can’t absorb the very lowest bass frequencies unless:
- They’re built super-thick, or…
- They’re spaced far off the wall
Porous absorption (aka velocity-based absorption) works most effectively where a sound wave is at maximum velocity, which in your room is 1/4 wavelength from the wall.
For example, a 100 Hz wave is 11.3 feet long, so its point of maximum velocity is 2.8 feet off the wall. The problem is, few rooms can spare that much space for just acoustic treatment.
Yet despite their flaws, porous absorbers still dominate probably 95% of the commercial bass trap market.
And you’ll see why in this next section…
Resonant Bass Traps: The Lesser-Known Sibling
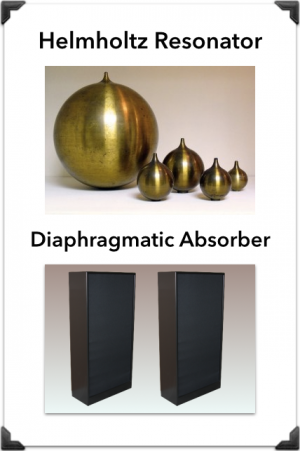
Compared to porous bass traps, which offer great broadband coverage but lack in bass absorption…
Resonant absorbers (aka tuned traps, narrowband absorbers, pressure absorbers) essentially do the opposite.
They specialize at zeroing-in on specific problem frequencies within a particular room. While ignoring everything in the mid/upper range.
And unlike porous traps which work better when spaced off the wall…resonant traps work best up against the wall sound waves collide, where pressure is highest.
And this is good news, because it means they occupy far less space in the room.
The 2 types of resonant bass traps to know are:
- Helmholtz Resonators – which absorb bass frequencies through a small port in an air-tight cavity.
- Diaphragmatic Absorbers – which neutralize bass frequencies with a vibrating panel or membrane.
Both can work well in the studio. But diaphragmatic absorbers are far more popular, because they’re easier to design, and occupy less space.
For these reasons, diaphragmatic bass traps are especially loved in high-end pro studios. No surprise though, they often need to be custom made, and are much more expensive than broadband absorption.
So home studios rarely use them.
Up next…
Porous + Resonant Absorption: The Synergistic Effect
In most pro studios, with the budget and space to use both, porous and diaphragmatic absorbers work as a team, since each one is strong where the other is weak.
And simply by adjusting their ratio, you can control the type of acoustics you want.
For example:
- A drier “studio sound” can be achieved with lots of porous absorption, or…
- An ambient “live sound” can be achieved with less porous absorption, and more diaphragmatic.
Some studios will even design custom hybrid bass traps which use a combination of both.
However since these solutions aren’t practical for the vast majority of us, here’s what I’d recommend you do instead:
The Ideal Absorption Strategy for Most Home Studios
For the vast majority of home recording studios, it’s far wiser to just skip the resonant absorption entirely, and stick to porous bass traps.
Reason being: effective use of resonant absorption typically requires a custom-designer to:
- evaluate the room’s acoustics and dimensions
- diagnose the biggest problems
- build a custom trap specifically for that room
And a poorly built trap may be totally ineffective, or even worse, cause more problems by resonating at the wrong frequency.
Porous absorption on the other hand, is a one-size-fits-all solution. And it’s far cheaper to buy, and easier to install.
So up next…
Triangular vs Flat Panel Porous Traps: Which is Better?
Porous bass traps come in two common designs:
- Triangular Corner Traps
- Flat Panel Traps
Corner bass traps have the advantage of more mass, which helps tame the lowest frequencies, as we learned earlier.
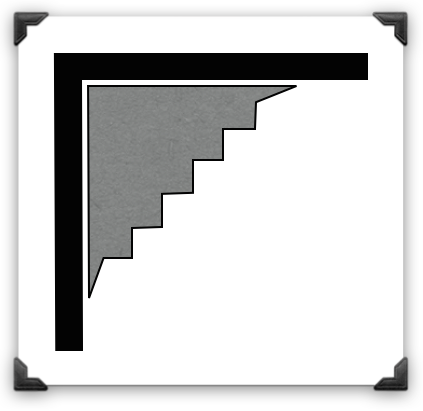
Panel bass traps on the other hand, use the air-gap method. With this strategy, you can cover way more surface area, using far less material.
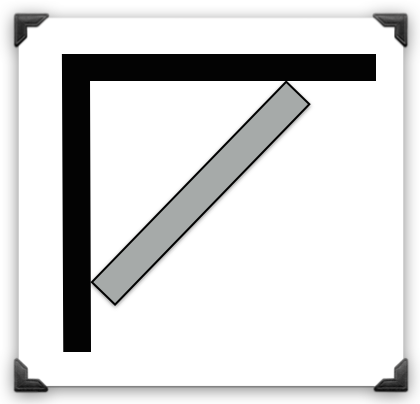
Ultimately, each one has its own advantages, and either one works fine.
For corner traps, here are the top models I suggest:
- Auralex LENRD – (Amazon/B&H/Thomann)
- Auralex MegaLENRD – (Amazon/B&H)
- Auralex ATOM-12 System – (B&H)
For panel traps, check out these links instead:
- Auralex Sonolite – (Amazon/B&H)
- Primacoustic Cumulus Corner Trap – (Amazon/B&H)
- Ultimate Acoustics Beveled Trap – (Amazon)
Up next…
How Many Bass Traps Do You Need for a Typical Room?
Even in the smallest 10×10 bedroom studios, you’ll get a progressive benefit from as many as 1-2 dozen bass traps.
However, since few people of us can afford that many, I recommend starting with either 4 or 8 at first, then possibly adding more later on…
- when you can afford it, and…
- if you deem it necessary.
Up next…
How to Properly Mount Bass Traps in Your Room
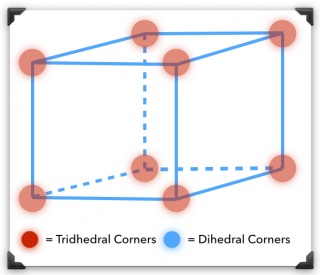
The standard starting points to mount your traps are the trihedral corners of the room (shown in the picture as red dots).
The reason they are known as trihedral corners is because they simultaneously cover all 3 dimensions of the room.
So a trap placed at this location will cover not only 1 surface of the room, but 3. Making it 3x more effective in that spot.
In reality though, it’s even more than 3x, because the corners are also the most common spots in the room where bass frequencies accumulate, and resonate for longer than they naturally should.
So, if you’re starting with 8 traps, put one in each corner. If you’re starting with 4, put them in the upper 4 corners to save yourself floor space.
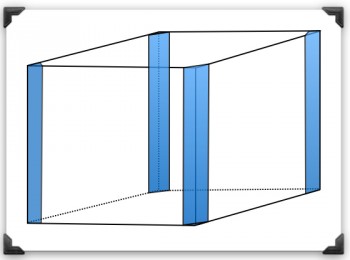
For most rooms, that should be enough. However if you still have more, the next step is to stack them in columns along the vertical dihedral corners, as shown in the picture below.
And finally, if you still have more to work with, mount them on the upper dihedral corners of the room, as shown in the picture below.
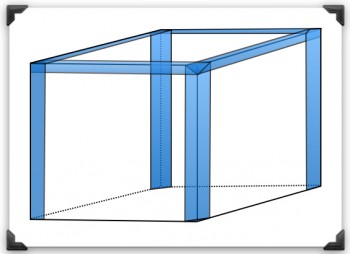
At this point, the amount of low-end absorption in the room is probably as good as it’s gonna get.
In all likelihood, you won’t need nearly this many to get a decent sound from the room. But with bass traps specifically, it’s really difficult to find yourself with too many.